

Images have a heavy weight across online platforms and it’s no different for aesthetics businesses. You can have years of experience, certificates of the most prestigious courses, the latest equipment and high-quality products but none of them will be as convincing to your prospective patients as before and after photos of your previous work.
These photos are possibly one of the best advertising materials and most influential ones when it comes to selecting a specific doctor or clinic. According to the survey conducted by RealSelf, 83% of patients researching cosmetic surgery procedures said they would not consider a practice that doesn’t have a before and after gallery shared on their website.
Before and after photos can give an amazing opportunity to convert online visitors into patients but they also may have an opposite result if taken in a wrong way. We put together some aspects that are worth to be considered if you want to produce the very best quality materials that will really move your business forward.
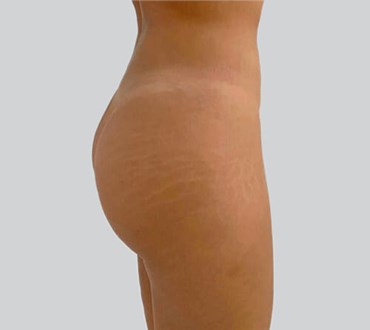
Figure 1: Buttocks before photo. © Dr Guy Haddad
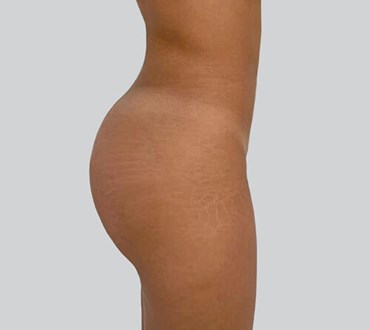
Figure 2: Buttocks after photo. © Dr Guy Haddad
1. Background
Simplicity and consistency are key. The goal of your photos is to show the results of the procedures you have conducted. To make people focus only on this aspect use a plain hanging background for your photos. The best option however would be to arrange a dedicated area of your office for the purpose of photoshoots.
2. Patient’s Pose & Camera Angles
It is difficult to compare the procedure results if a person is standing close to the camera in one photo and then further away in another one. To make sure your photos are consistent, you can use tape and put marks on the floor to indicate where a patient should stand or sit as well as where a camera, a person using it or a tripod should be located.
If you’re not sure if your photo shows the results perfectly, you may take several shots both before and after the procedure, asking your patient to stand in front of the camera in a normal, centered way and then to show both right and left profile. You can also try to catch some other angles which are in between to have a variety of images from which you can select the best ones.
Always remember to keep the same angles and perspectives when taking both pre- and post-treatment photos. If your photos need a bit of cropping, ensure the framing is also the same. For other adjustments, keep them to an absolute minimum to ensure a proper level of credibility.
3. Patient’s Outfit & Appearance
Again – keep things simple. For face procedures, ask your patient to remove all unnecessary accessories and make up as needed. Don’t forget about hair – a neat hairstyle with a clean headband and locks pulled back from the face will be the best option.
For body contouring procedures, underwear or swimwear are the best choices as only in this way it is possible to show full body in detail. You can provide your patient with disposable underwear or ask her/him to wear the same or at least similar underclothing in both sets of images so that the focus will be on procedure results and not on the outfit’s details.
4. Camera & Lighting
Preferably, you should consider investing some money in good camera equipment. However, if for some reason you don’t want to do it, you can still take photos using your smartphone and achieve amazing results. Try to play with the settings and see what works best for you. Remember to take photos using the front camera only and always keep the lens clean.
Bad lighting will always mess up with your before and after photos no matter how much you have invested in your camera equipment. Shadows are the biggest challenge as they can distract, distort and make features such as folds, wrinkles or scars appear worse than they look in real.
Adding an external flash may help with solving these issues. A studio lighting kit is the best to have when taking photos as it places light on each side of the client’s face or body. If you don’t have it, you may use a flash with your camera. Alternatively, you can have your photo-shooting setup facing the window and take pictures using daily light, however, it’s best not to rely on that since it will give you different effects depending on the time of the day.
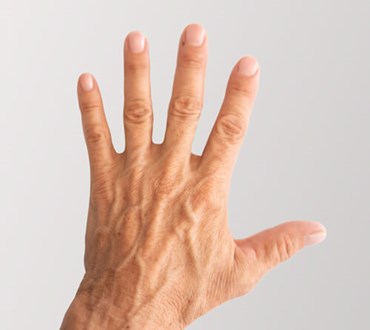
Figure 3: Hands before photo. © Dr Piero Crabai
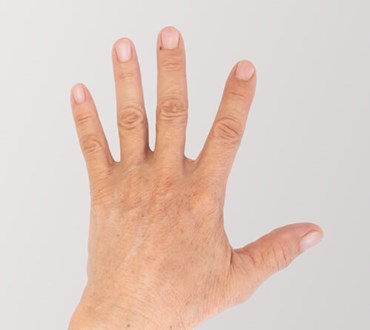
Figure 4: Hands after photo. © Dr Piero Crabai
5. Patient’s Consent & Comfort
Proper explanation of patient’s rights and having a signed consent form with a written confirmation of your permission to take photos and use them for commercial purposes can help you avoid any possible misunderstanding.
Always make sure your client has a proper level of privacy and comfort. A dedicated photography space should not only fit the camera and lighting equipment but also ensure your patient can freely undress.
6. Labelling System
The number of images that you and your team will capture over the course of only one week might be overwhelming and without a proper labelling system in place your efforts for setting up the before and after gallery might be ruined.
For that reason, having a labelling system in place is a game-changer. While naming your files remember to include the date, patient’s name, whether it’s before or after, specific body area and type of treatment.
What you can also consider is having a guide for your employees to which they can easily refer in any doubts – and ultimately avoid any mistake when sharing photos online.
Building the before and after gallery for sure is an investment – but it’s definitely worth it. Even if you can’t master all of the mentioned points immediately, it’s good to at least start applying some of them and work on the rest gradually.
References
1. The Facts About Photos Don’t Lie, Part I
https://insightscenter.realself.com/the-facts-about-photos-dont-lie-part-i/
[Last accessed on 3rd March 2020].
COMMENTS ARE WELCOME